Deployment of Mediation Devices
In order to facilitate the monitoring and control of smart microgrids, such as the micro-hydro sites at Palpa, the installations have to be instrumented with small mediation devices.These devices comprise a Raspberry Pi computer with an associated Micro-SD Card inside it.
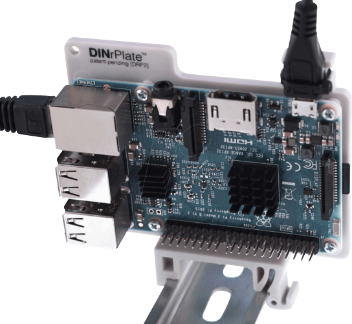
Raspberry Pi (RPi)
Our recommendation is to use the Raspberry Pi (RPi) 3b+ as the mediation device. The RPi 3b+ model has sufficient processing power and memory, adequate USB ports, built in WiFi and lower power consumption and heat output relative to the later RPi 4 model. They are also the optimum device in terms of price/performance.
We advise using a common RPi across the site as alternating between the models can be confusing when setting up Over-The-Air (OTA) updates if different baselines and updates are required by different Pis. It’s always easier if they share a single base be that 3e2 bit or 64 bit.
Micro-SD Card
Each RPi will require a removable Micro-SD Card to host its Linux Operating System and the SMC software. We recommend using a minimum of 16GB storage capacity for the Micro-SD card.
RPi enclosure and data network connection
The enclosure can vary depending on where the device is located. When choosing a place for the RPi, it is prudent to consider the following:
-
Reliable mains electricity availability (230Volts and frequency of 50Hz is used in Europe, most of Africa, Asia and Australia, and much of South America).
-
In most cases, each RPi requires a connection to a data network with internet access. This can be achieved via a wired (ethernet) or a wireless connection. Placing the RPi near a router or switch will make sense for locations where Wi-Fi is not available or is unreliable. Ethernet cable length (e.g.Cat6) can be a maximum of 100 meters.
-
RPi will need to be close to the generator PLC, meters or routers if it is going to be physically connected via an ethernet, USB, RS485 or other cables.
Mounting
There are three options mounting the Pi depending upon it’s intended location. In each one a protective case or a din-rail mount is necessary.

Indoors: inside of an existing enclosure
This is the most convenient option if it can be arranged. The enclosure should accommodate adequate space for cooling and cable runs around the RPi.
Outdoors: inside of an existing enclosure
The outdoor enclosure should be IP66+ weather-proof and accommodate adequate space for cooling and cable runs around the RPi.
Requires a dedicated enclosure indoor or outdoor
The enclosure should ideally be IP66+ and include adequate free space for any wires and additional RPi hat. We recommend using a minimum 20 x 20 x 20cm size and use a din-rail mount to secure the RPi to the enclosure’s internal wall. When choosing the enclosure, it is important to consider a material that does not impair the communication path for the mediation device by causing interference or constraint to the communications signals such as Wi-Fi, GSM and GPS.
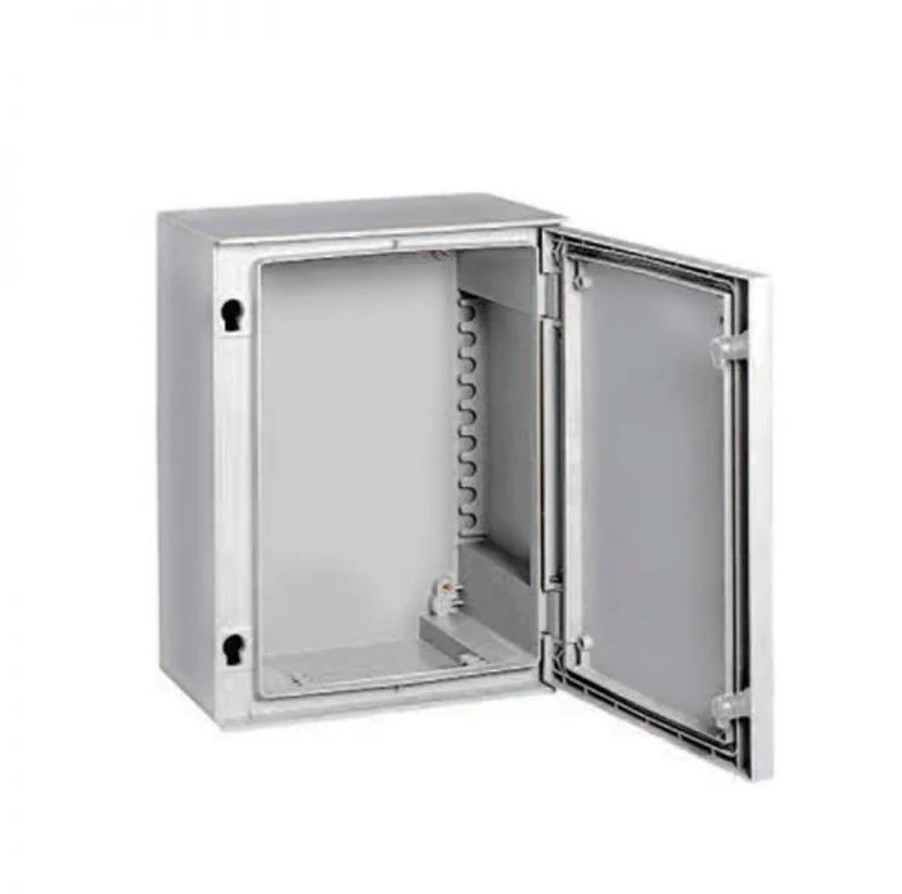
Acrylonitrile Butadiene Styrene (ABS) or Glass Fibre Reinforced Polyester (GRP) are desirable as they can be drilled if necessary and do not inhibit wireless communications.
Cable runs
It is important to protect the integrity of a IP66+ enclosure when drilling holes for cables inside the box: The holes should always be underside the box facing the ground unless specified otherwise. The correct size glands should be used for the holes.
Power Supply
Sometimes a defective power supply induces a system failure. It is crucial to procure the correct power supply from a certified manufacturer. We recommend using the RPi brand power supply. All RPi models require a 5.1V supply. There is low-voltage detection circuitry that will detect if the supply voltage drops below 4.63V (+/- 5%) and the solid red light will flash or turn off completely if the voltage fluctuates.
Preparing the Micro-SD Card for a mediation device
Requirements
-
Raspberry Pi
-
Micro-SD Card
-
16GB micro-SD card is desirable - e.g. SanDisk Ultra microSDHC UHS-1 16GB
-
BalenaEtcher BelenaEtcher is the software used to copy or flash the RPi Operating System (OS) image onto a Micro-SD Card. Download BalenaEtcher to your desktop computer
-
Computer with a Micro-SD reader (to flash the Micro-SD card)
Steps
-
Download the OS image for RPi to your desktop computer via the link which we will provide. Using BalenaEtcher, flash the OS image onto the Micro-SD card following Etcher’s 3-step process.
-
Insert the Micro-SD card inside the RPi.
-
Power on the RPi. (If the RPi is connected via ethernet rather than Wi-Fi then steps #5 and #6 are not required).
-
The RPi will create a local hotspot which can be discovered with a Wi-Fi enabled device such as a mobile phone.
-
Once connected to the RPi hotspot, you will be presented with an interface where you can put the local Wi-Fi SSID and password into the RPi to establish a wireless connection. The RPi will take several minutes to download its applications from our registry. The green activity light will flash busily while this is happening.